CS280A Project 2
Fun with Filters and Frequencies!
Name: Cyrus Vachha (cvachha@berkeley.edu)
Introduction
This project focuses on image processing and manipulation regarding the frequencies of images allowing for operations such as edge detection, generating image hybrid composites, and image blending. I also learned about the decomposition of levels of frequencies in images, through gaussian and laplacian stacks, which enable these interesting blending effects. Some methods from Hybrid Images SIGGRAPH paper (Oliva et al 2006) and A Multiresolution Spline With Application toImage Mosaics (Burt and Adelson 1983) are re-implemented in this project.
Part 1: Fun with Frequencies
1.1: Finite Difference Operator
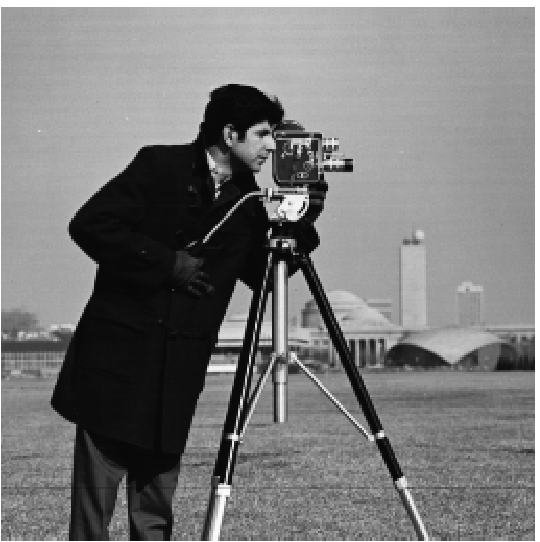
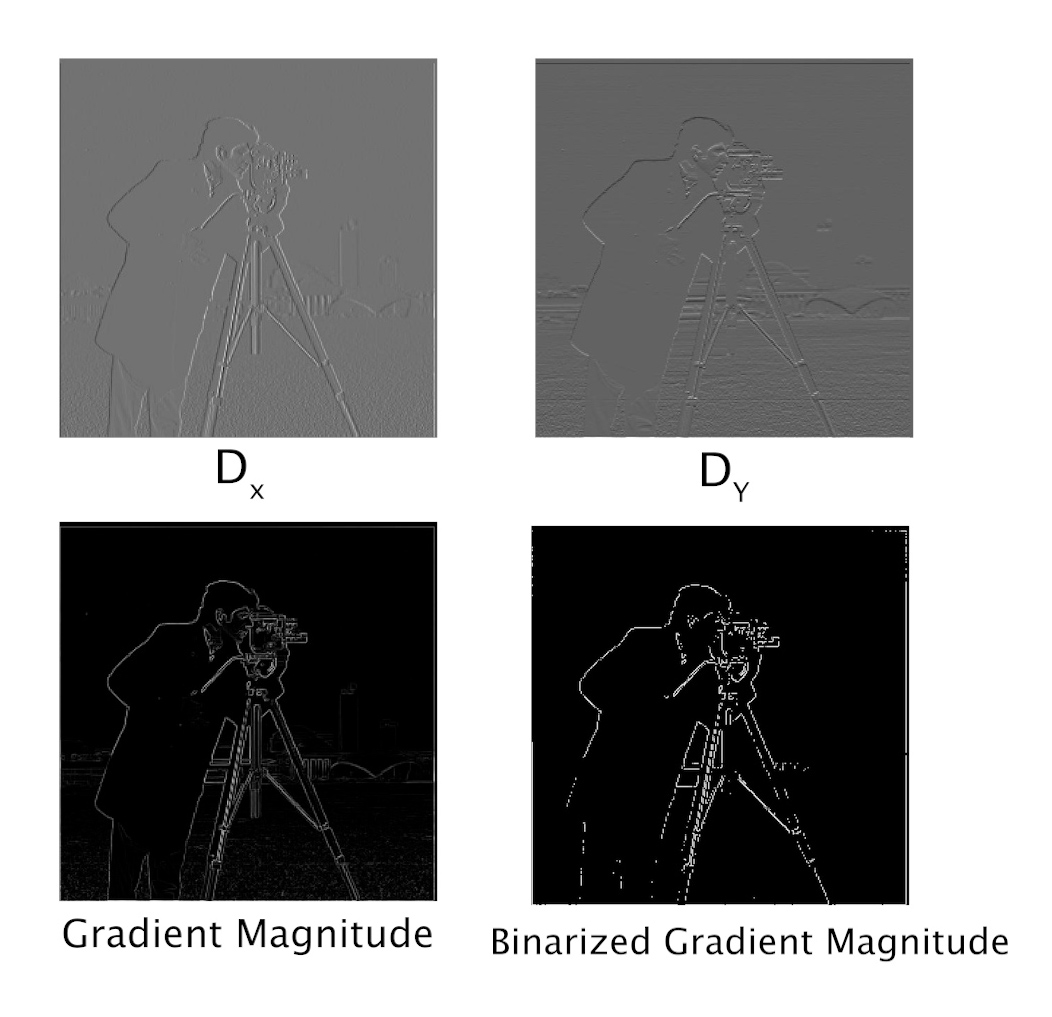
Given the finite difference operators D_x = [1 -1] and D_y = [1 -1]^T, we can convolve our cameraman image and calculate the gradient magnitude image by finding the magnitude (sqrt of the sum of the image convolved with squared D_x and squared D_y). In the process, we find the horizontal and vertical components of the edges of our image. We can also binarize the gradient magnitude image to view edges with a threshold of 0.4 to improve clarity and remove insignificant edges.
1.2: Derivative of Gaussian (DoG) Filter
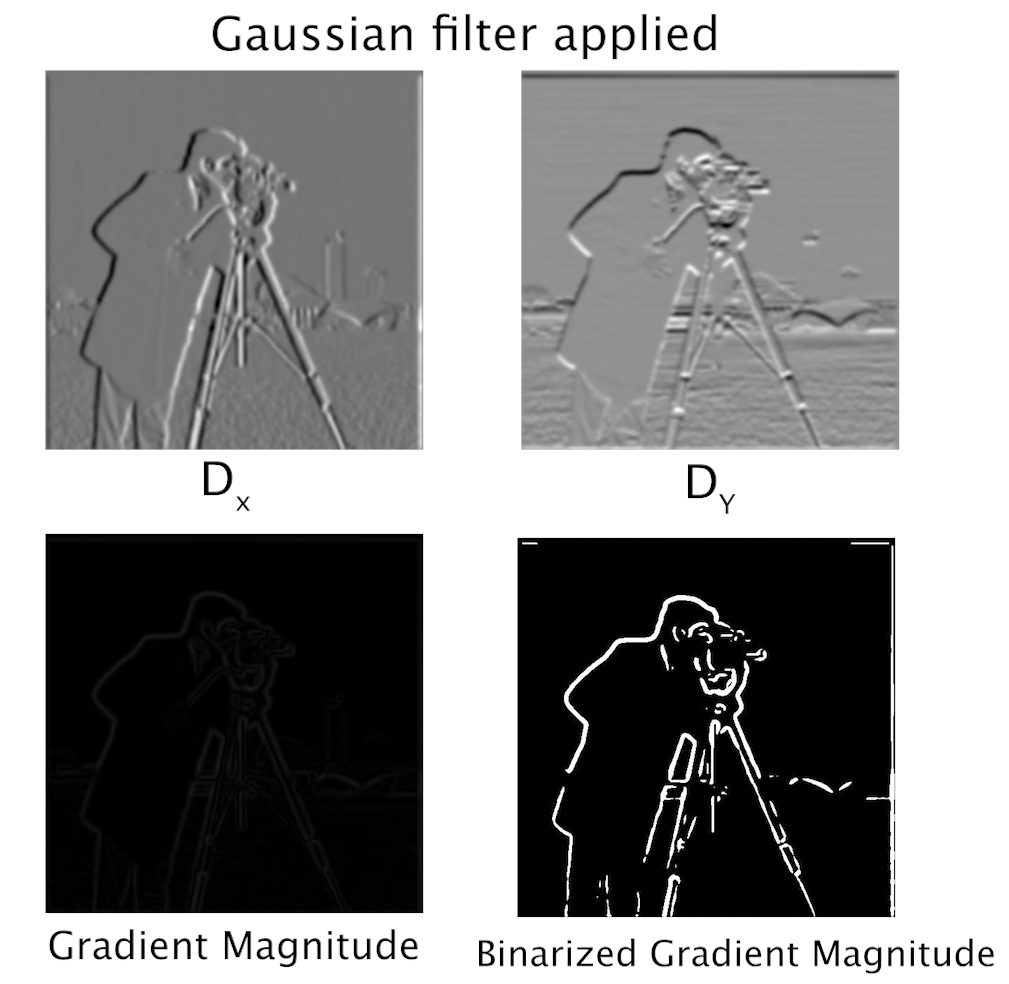
We see that the binarized edge filter from the previous part is aliased, rigid, and not continuous. We can improve the edges by applying a gaussian filter to the cameraman image before convolving it with the kernel. In this instance, I had to binarize at 0.05 to achieve viewable edges that mainly show the cameraman. I noticed that the gradient magnitude renders appear darker, however after binarizing it, the edges show up better.
We can see that by applying the gaussian filter first, the edges appear much smoother, wider, continuous, and don’t appear to be constructed of small thin vertical or horizontal lines.
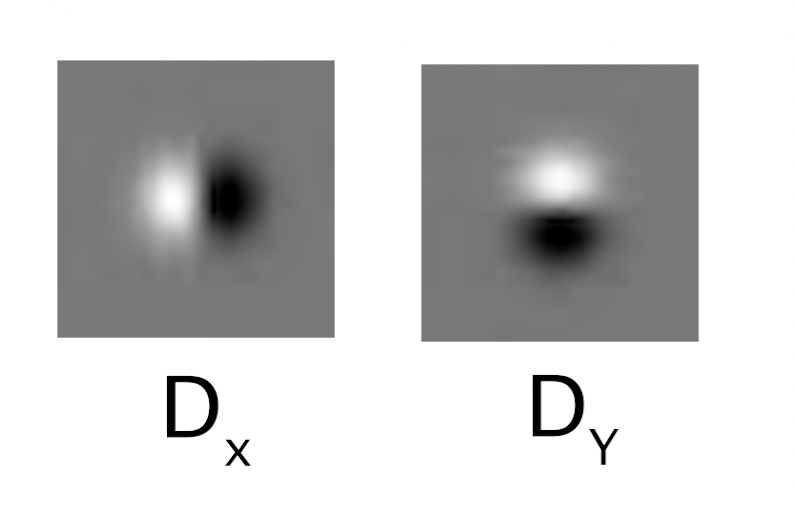
We can also use the derivative of the gaussian filter to achieve the same result. Convolving the D_x and D_Y operators with a gaussian gives us new filters. With these filters, we convolve them with the cameraman image to achieve the same results since the operation is commutative.
Filters

Part 2: Fun with Frequencies!
2.1: Image “Sharpening”
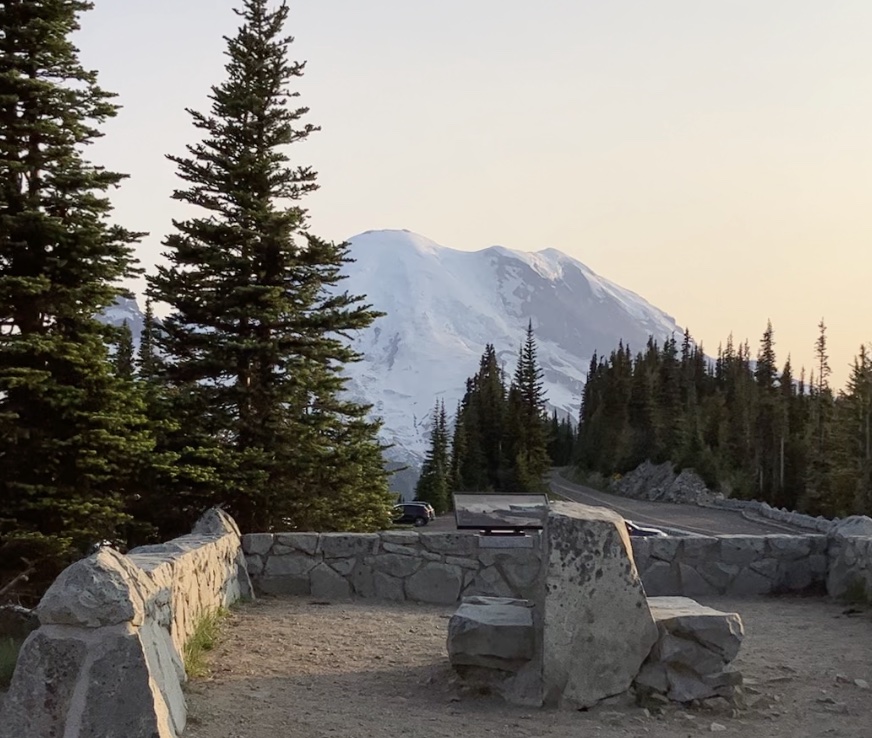
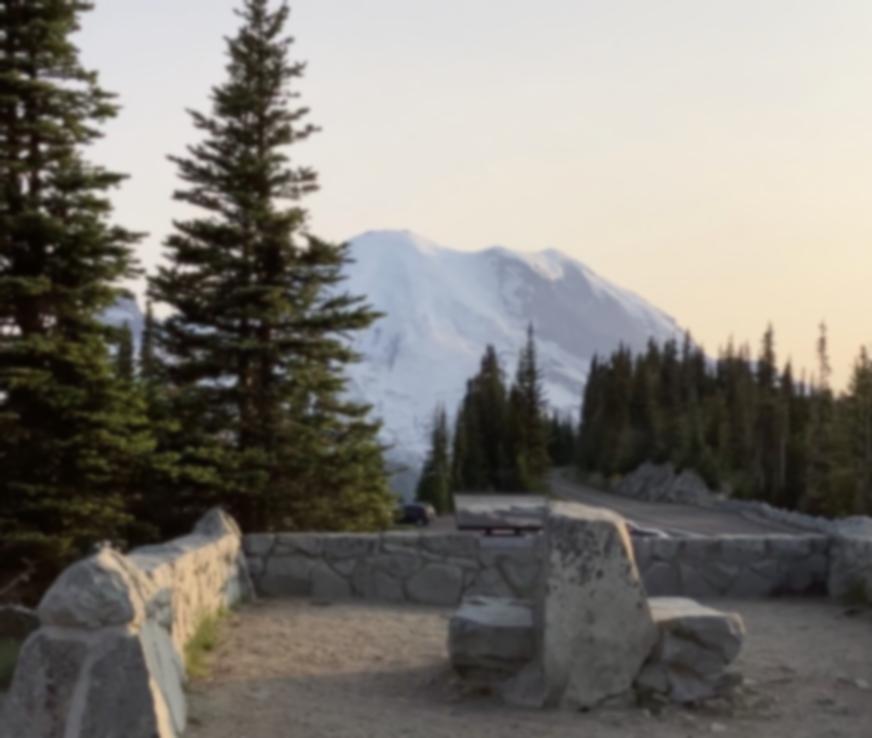
We can artificially sharpen an image by extracting the high frequencies of an image and adding them back to the original image at different factors. This “unsharp masking” operation creates an effect that appears to highlight edges and make them more prominent. By increasing alpha, the sharpness factor, we can see the edges more distinct and higher frequencies more visible showing the borders of the stones.
Custom Images
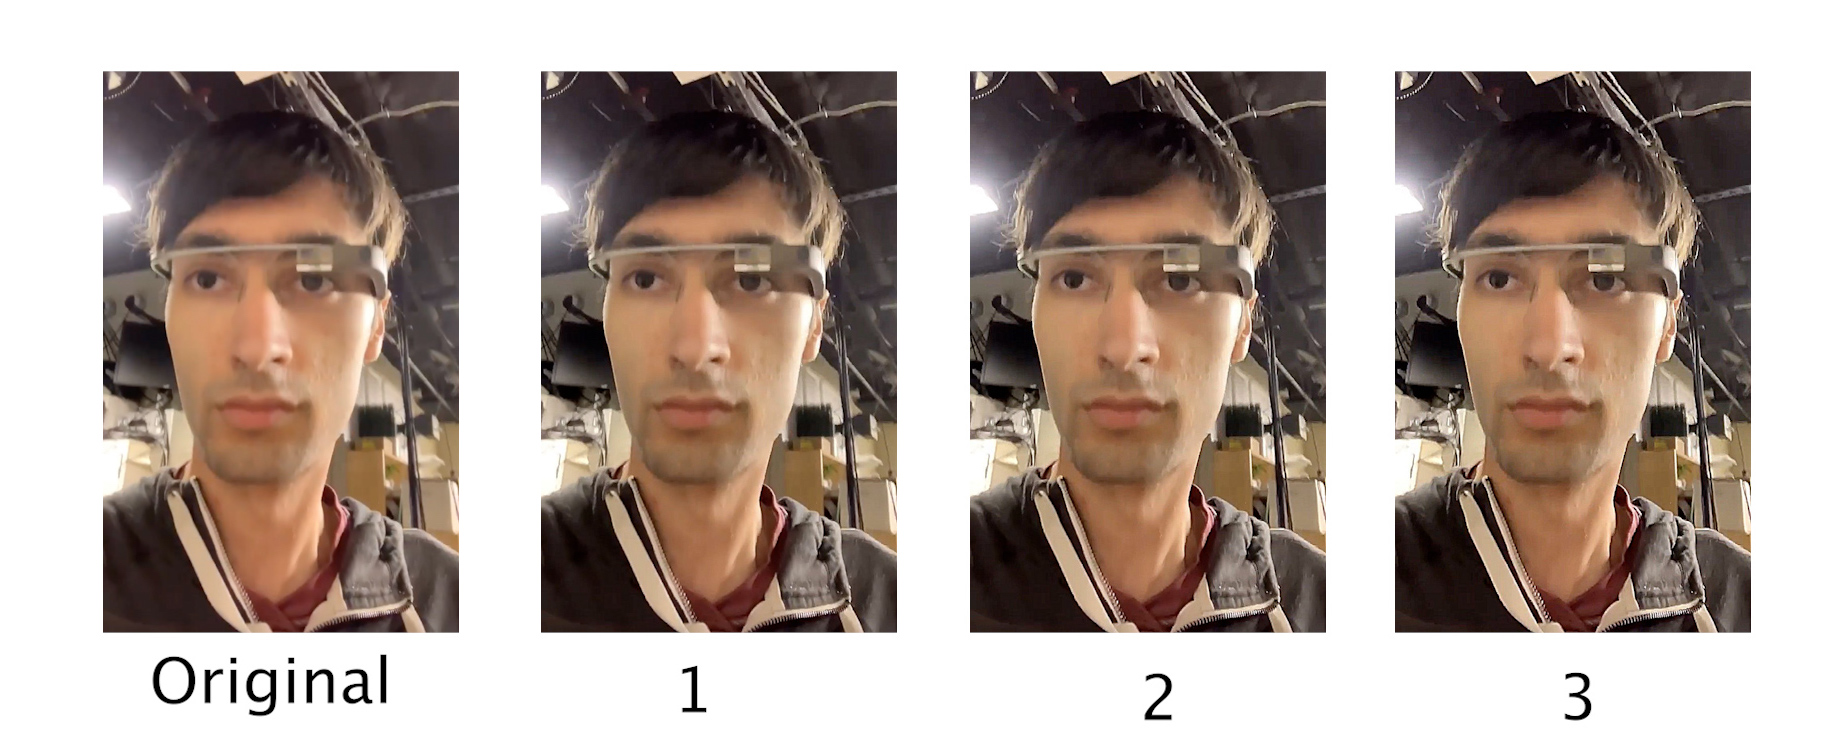
Google Glass
Evaluation Test: I also tried sharpening an image after blurring it to compare the artificially sharpened image with the original image. I first applied a gaussian filter to the original image to blur it, and then repeated the process of adding the high frequencies of the image back to itself. In comparison with the original image, the “sharpened” image does seem to have more visible edges than its blurred version but detail in the rocks and trees isn’t present. However, the shape of the branches on the trees looks more visible and the colors appear more consistent with the original image.
| Original | Blurred | Sharpened |
|---|---|---|
 |
 |
 |
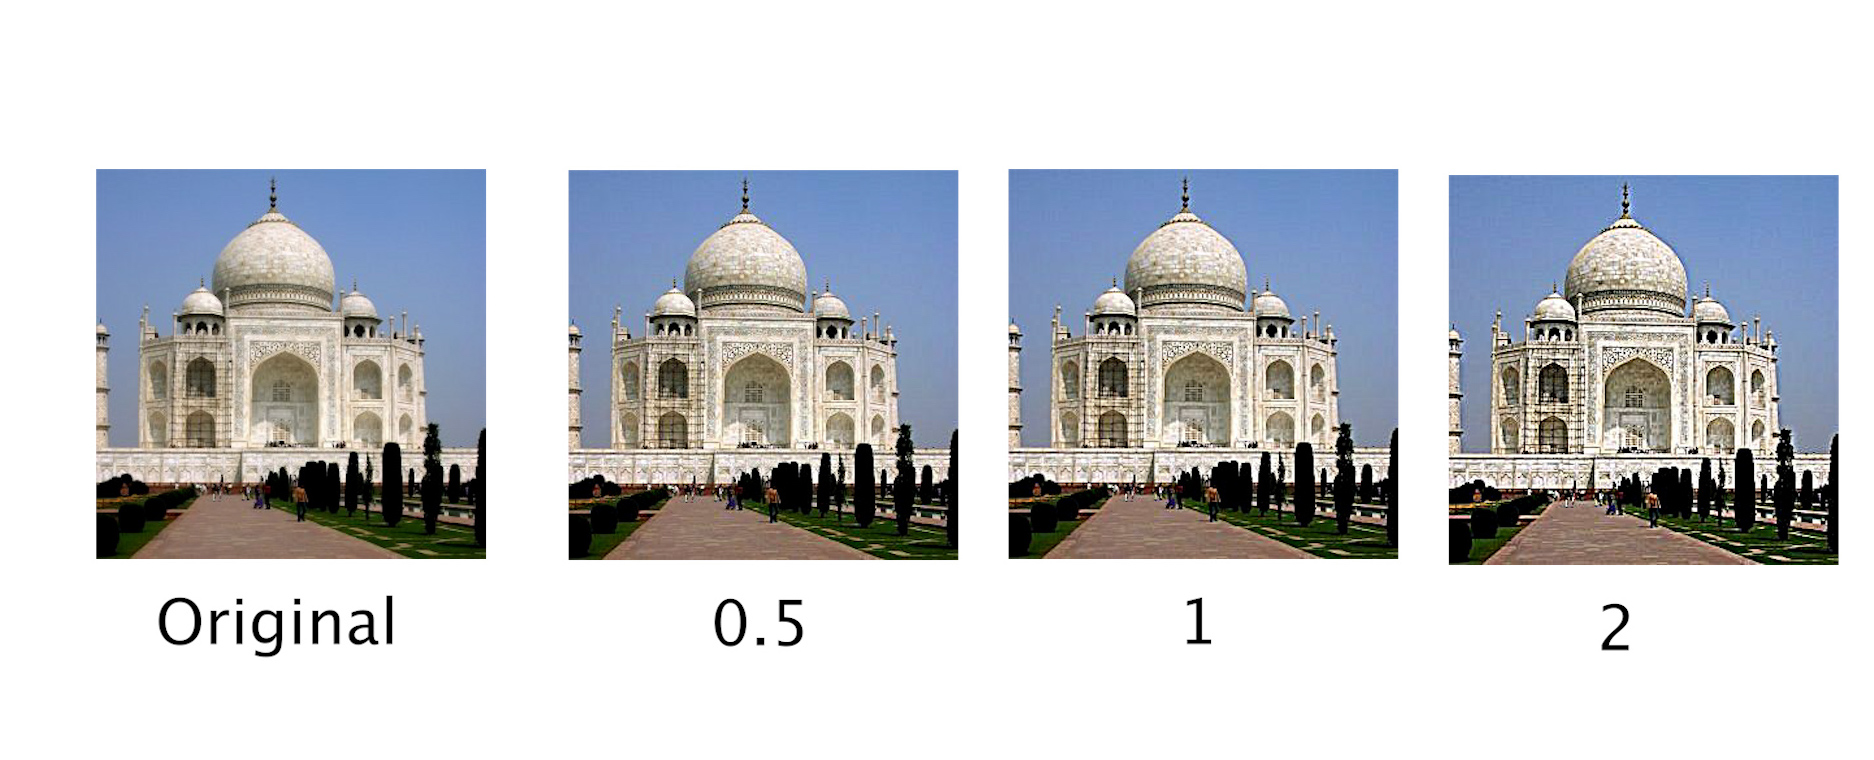
2.2: Hybrid Images
The Hybrid Images (Oliva et al 2006) paper from SIGGRAPH describes a technique to combine information from two images on a single one by extracting the high frequencies of one image and compositing them with the low frequencies of another. The resulting hybrid image gives the effect of showing the first image when the image is shown and full size, and the same image shows the second image when shrinked. This is achieved by adding the high frequencies of the first image to the low frequencies of the second one. The low frequencies are obtained by running the image on a gaussian filter and the high frequencies are calculated by subtracting the original image from its low frequencies.
In this example, we use Derek as a lower frequency image and his former cat, Nutmeg, as the high frequencies. As we can see, the image upclose shows details of Nutmeg, while if we shrink the same image, we see a slightly blurry image of Derek.

Custom Images
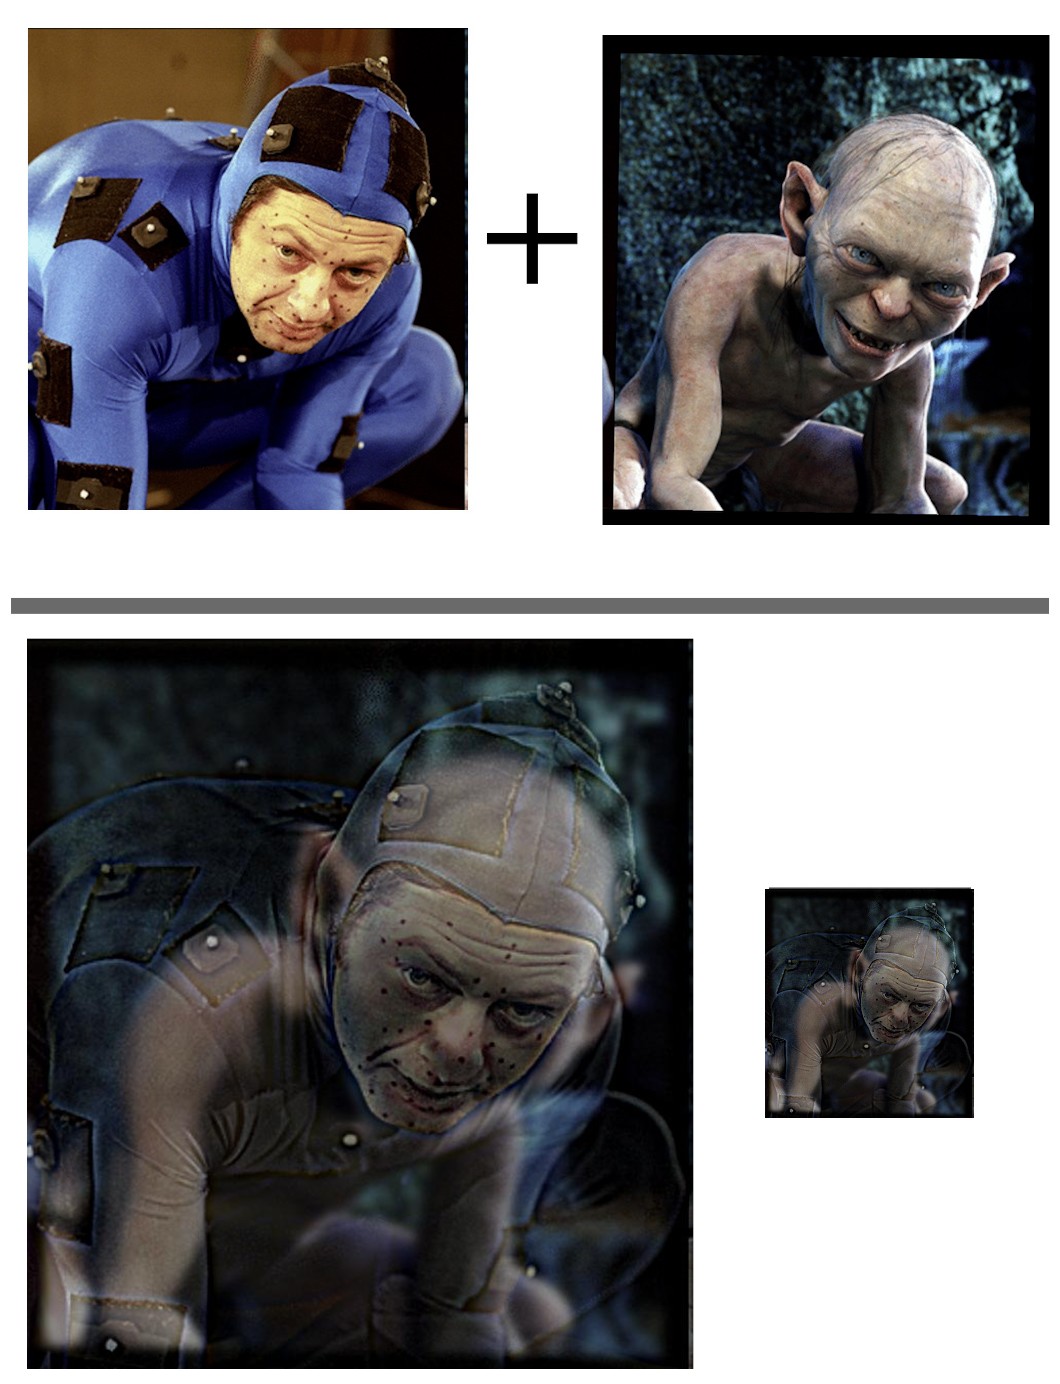
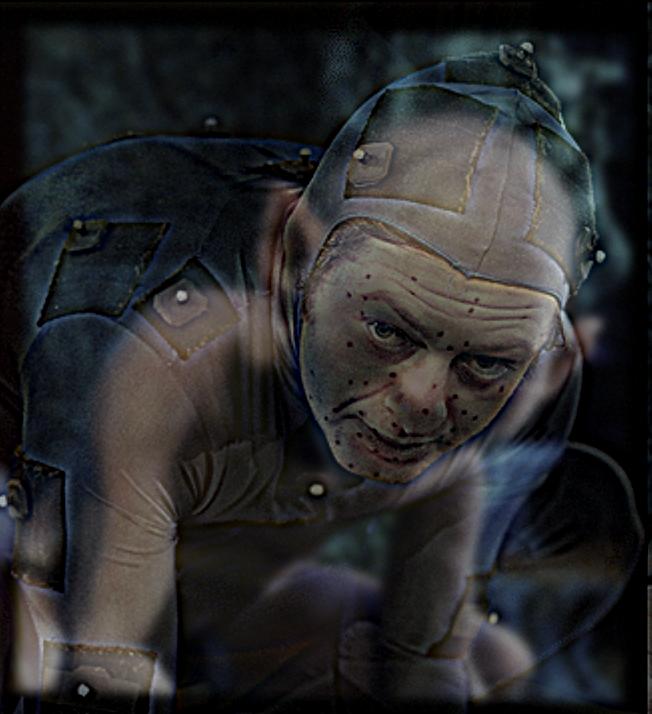
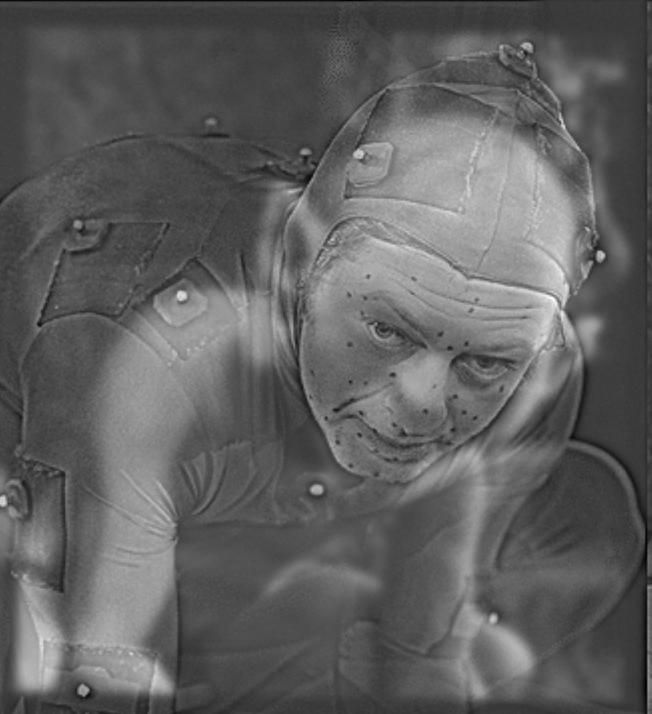
My favorite example I created is a hybrid image containing Andy Serkis in a performance capture suit and the digital character he plays, Gollum. I believe that these images are a good fit for a hybrid image since they retain a similar structure and facial features across each image. By keeping Serkis’ high frequencies and adding them to Gollum’s low frequencies, we can achieve a hybrid image where upclose, we see Serkis’s performance (with his motion capture dots), and when we zoom out, we see Gollum. For all of my examples, I had to manually align, scale, and position the images so the hybrid effect would look good.
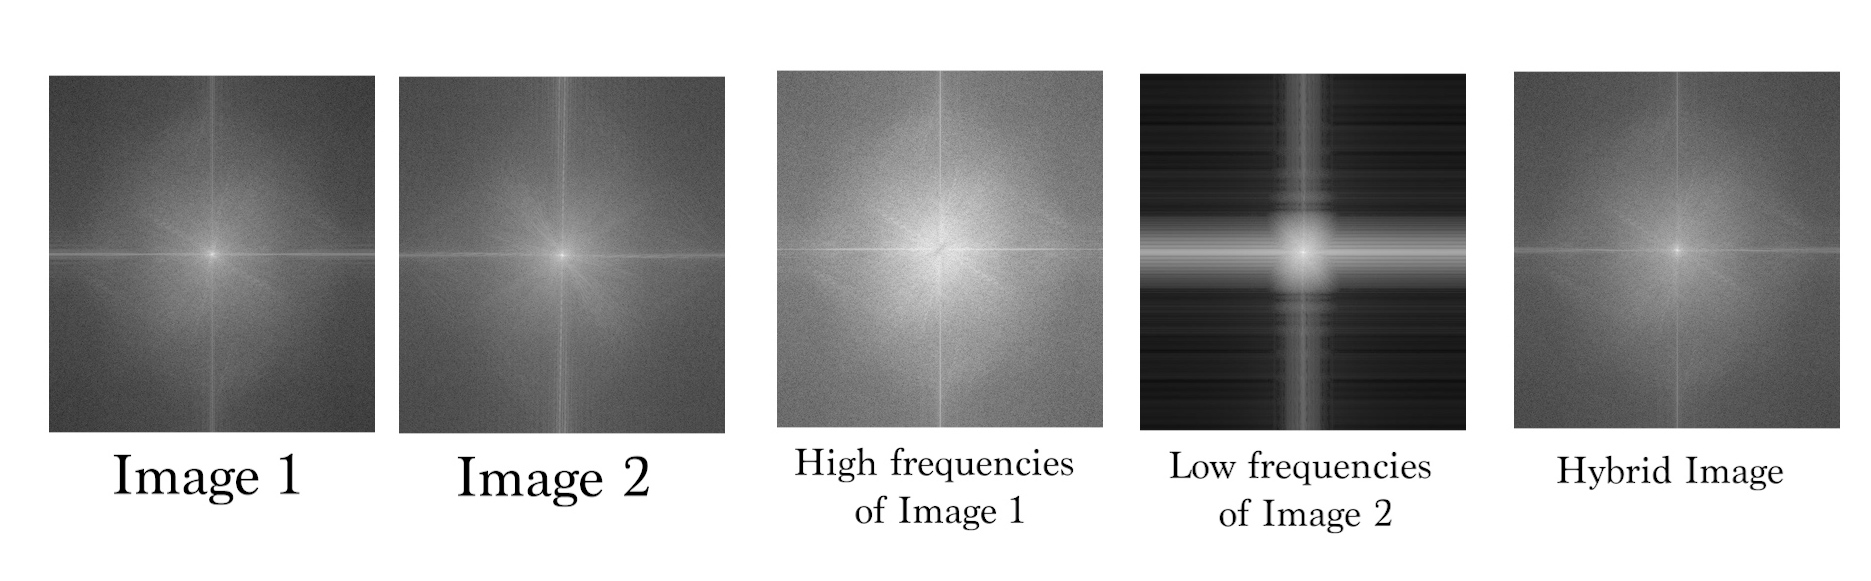
By performing a frequency analysis, we can see the log magnitude of the Fourier transform from the input images and the construction of the hybrid images.
| High Frequency (image 1) | Low Frequency (image 2) |
|---|---|
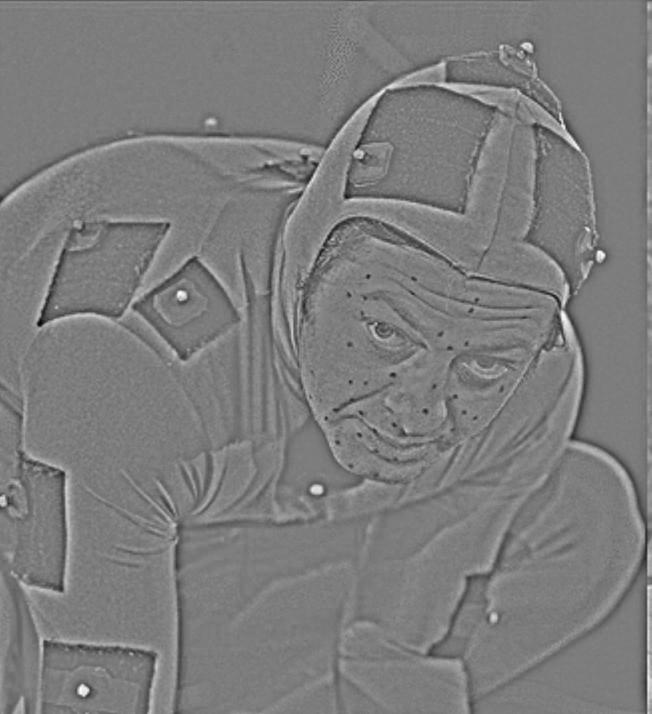 |
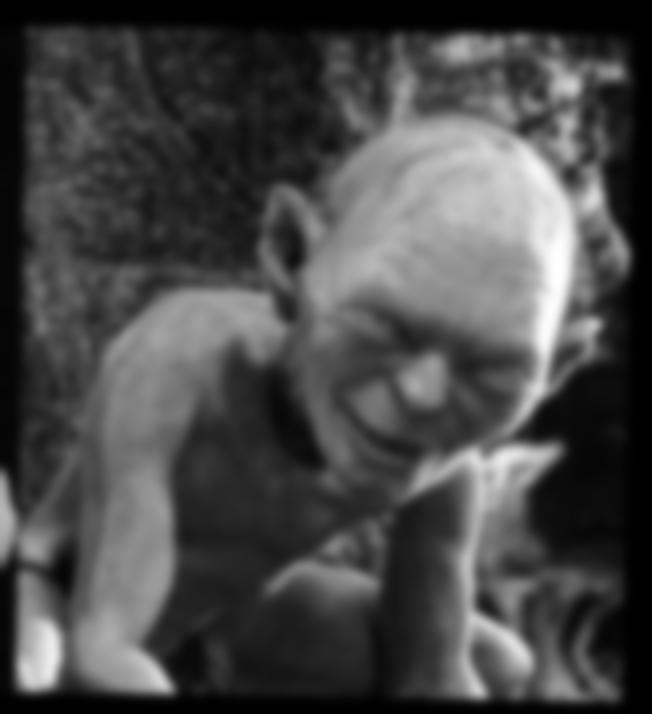 |
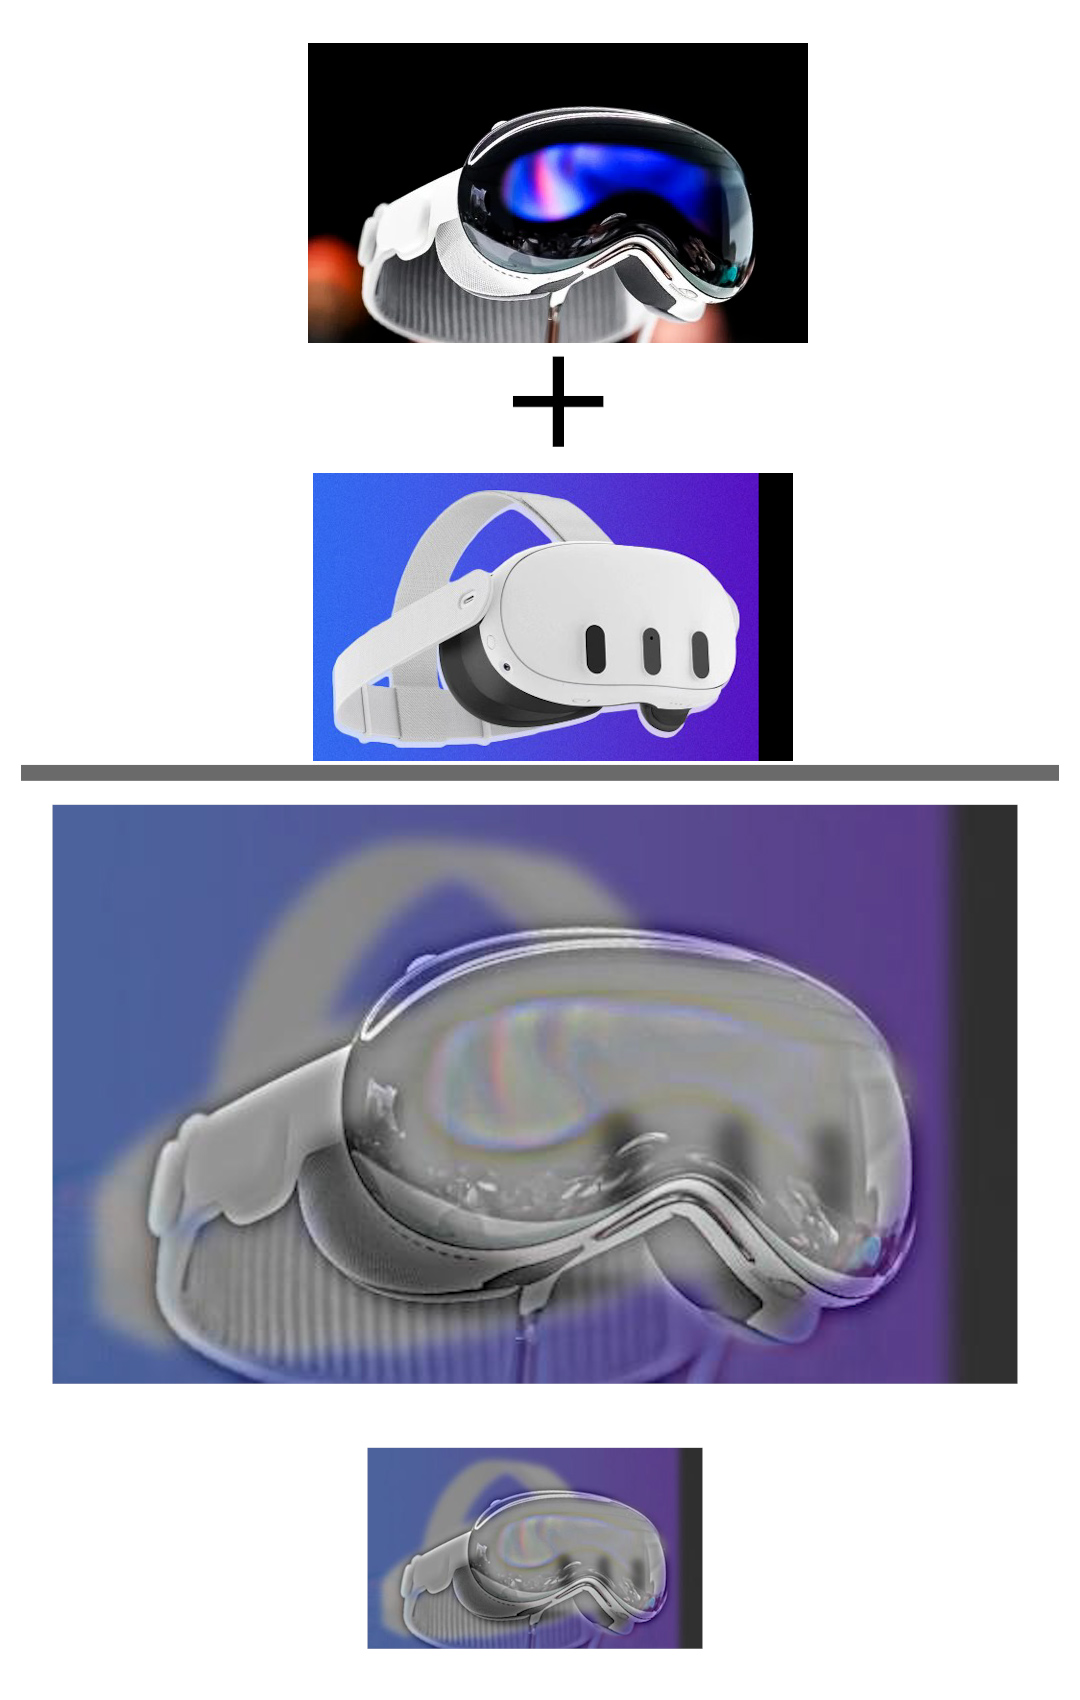
Another example I created was a hybrid image showing the Apple Vision Pro and the Meta Quest 3. I composited the high frequencies of the Vision Pro over the low frequencies of Quest 3.
I also tried creating a hybrid image of the real campanile with Paul Debevec’s miniature campanile and noticed that the color of the lower frequency real campanile photo still surfaces visibly in both “viewing modes” of the hybrid image, but we can use the hybrid image in a different context where zoomed in we see more information presented, which in this case is the exhibit of the miniature.

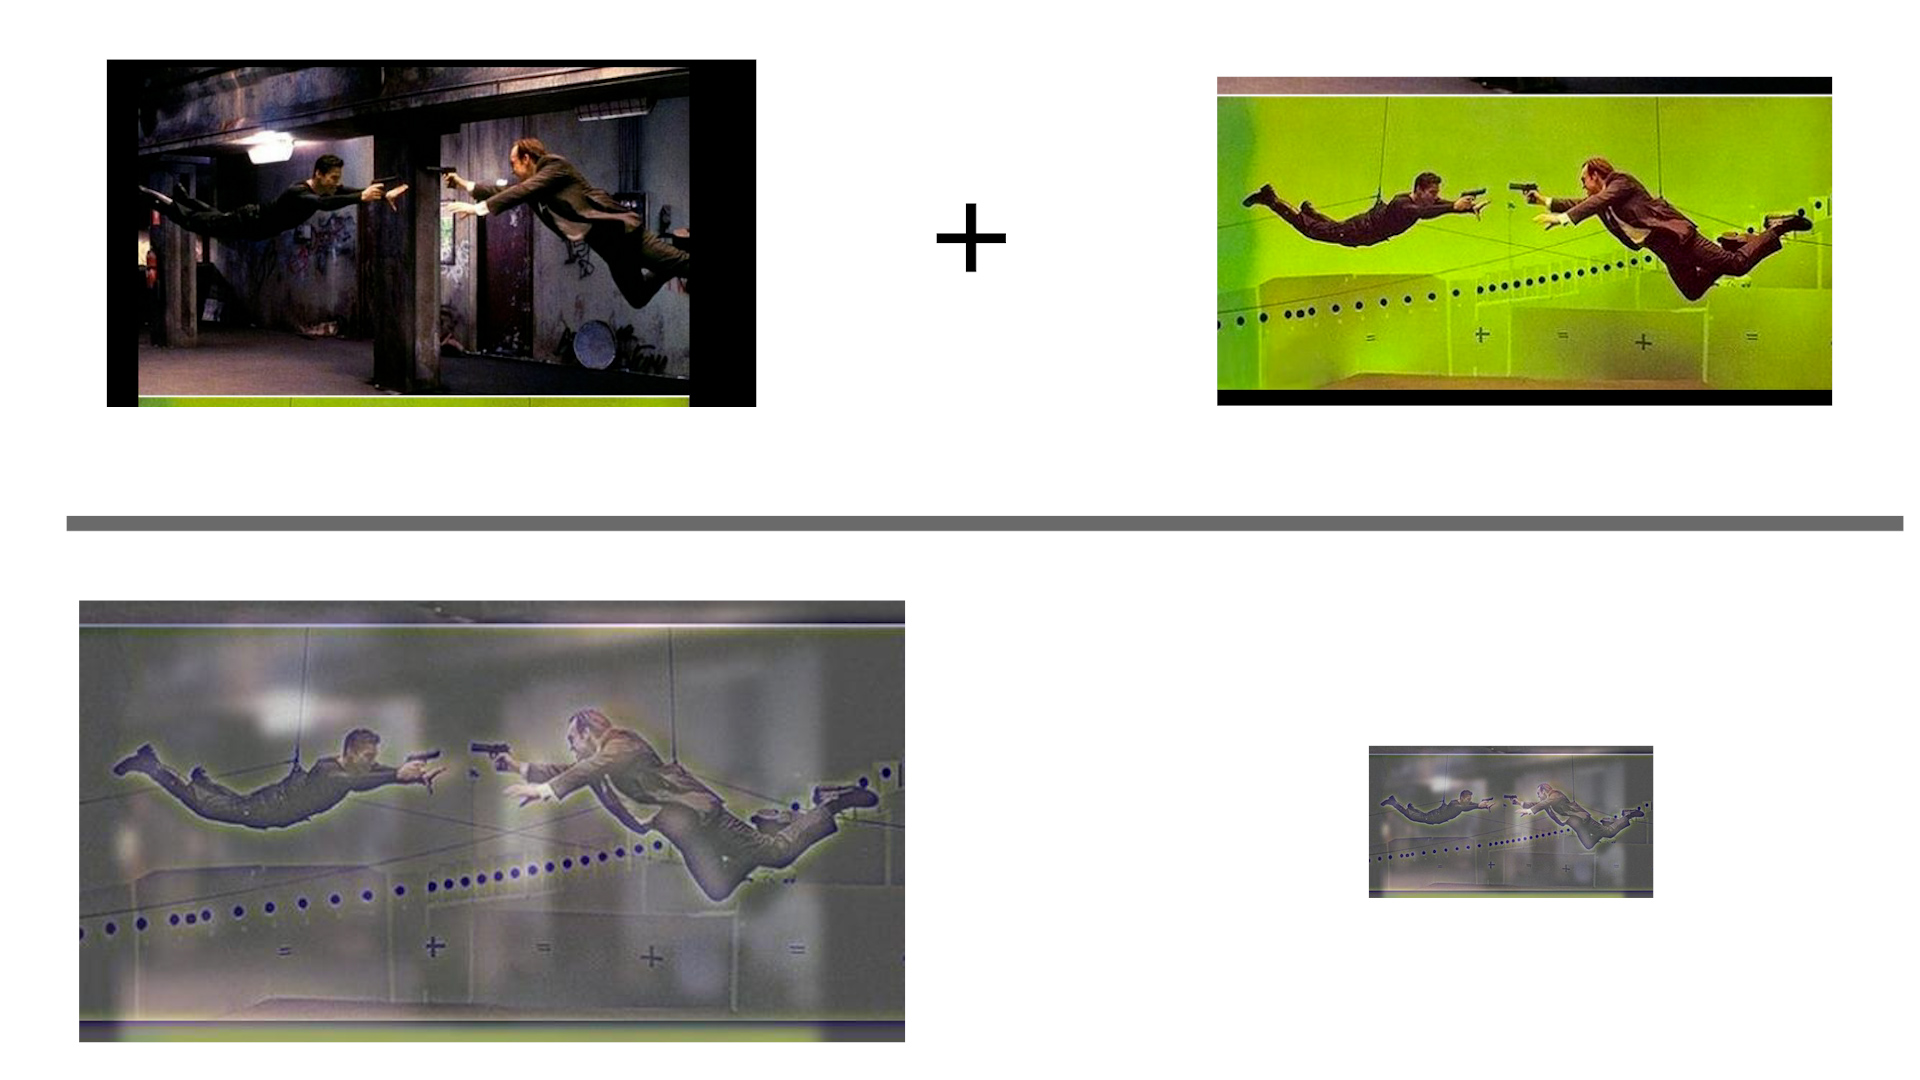
Failure case: I encountered a failure case when trying to create a hybrid image of a bullet-time sequence from The Matrix when blending a green screen set with the composited vfx background. The high frequency of the green screen set cameras and tracking markers appear in the zoomed out and in viewing modes of the hybrid image and the color of the background permeates visibly, so the image looks roughly the same in each case.
Bells and Whistles
| In Color | Greyscale |
|---|---|
 |
 |
For extra credit, I implemented the hybrid image generation with color by performing the operations on each of the R,G,B color channels and stacking them. We can see that adding color improves recognizability and differentiation between each image by adding more details such as the blue in Serkis’ performance capture suit. It appears that using color on both can help, but it is more visible in the lower frequency part of the image. However, adding color to the high frequency part does show the first image better than if it was in greyscale.
Multi-resolution Blending and the Oraple journey
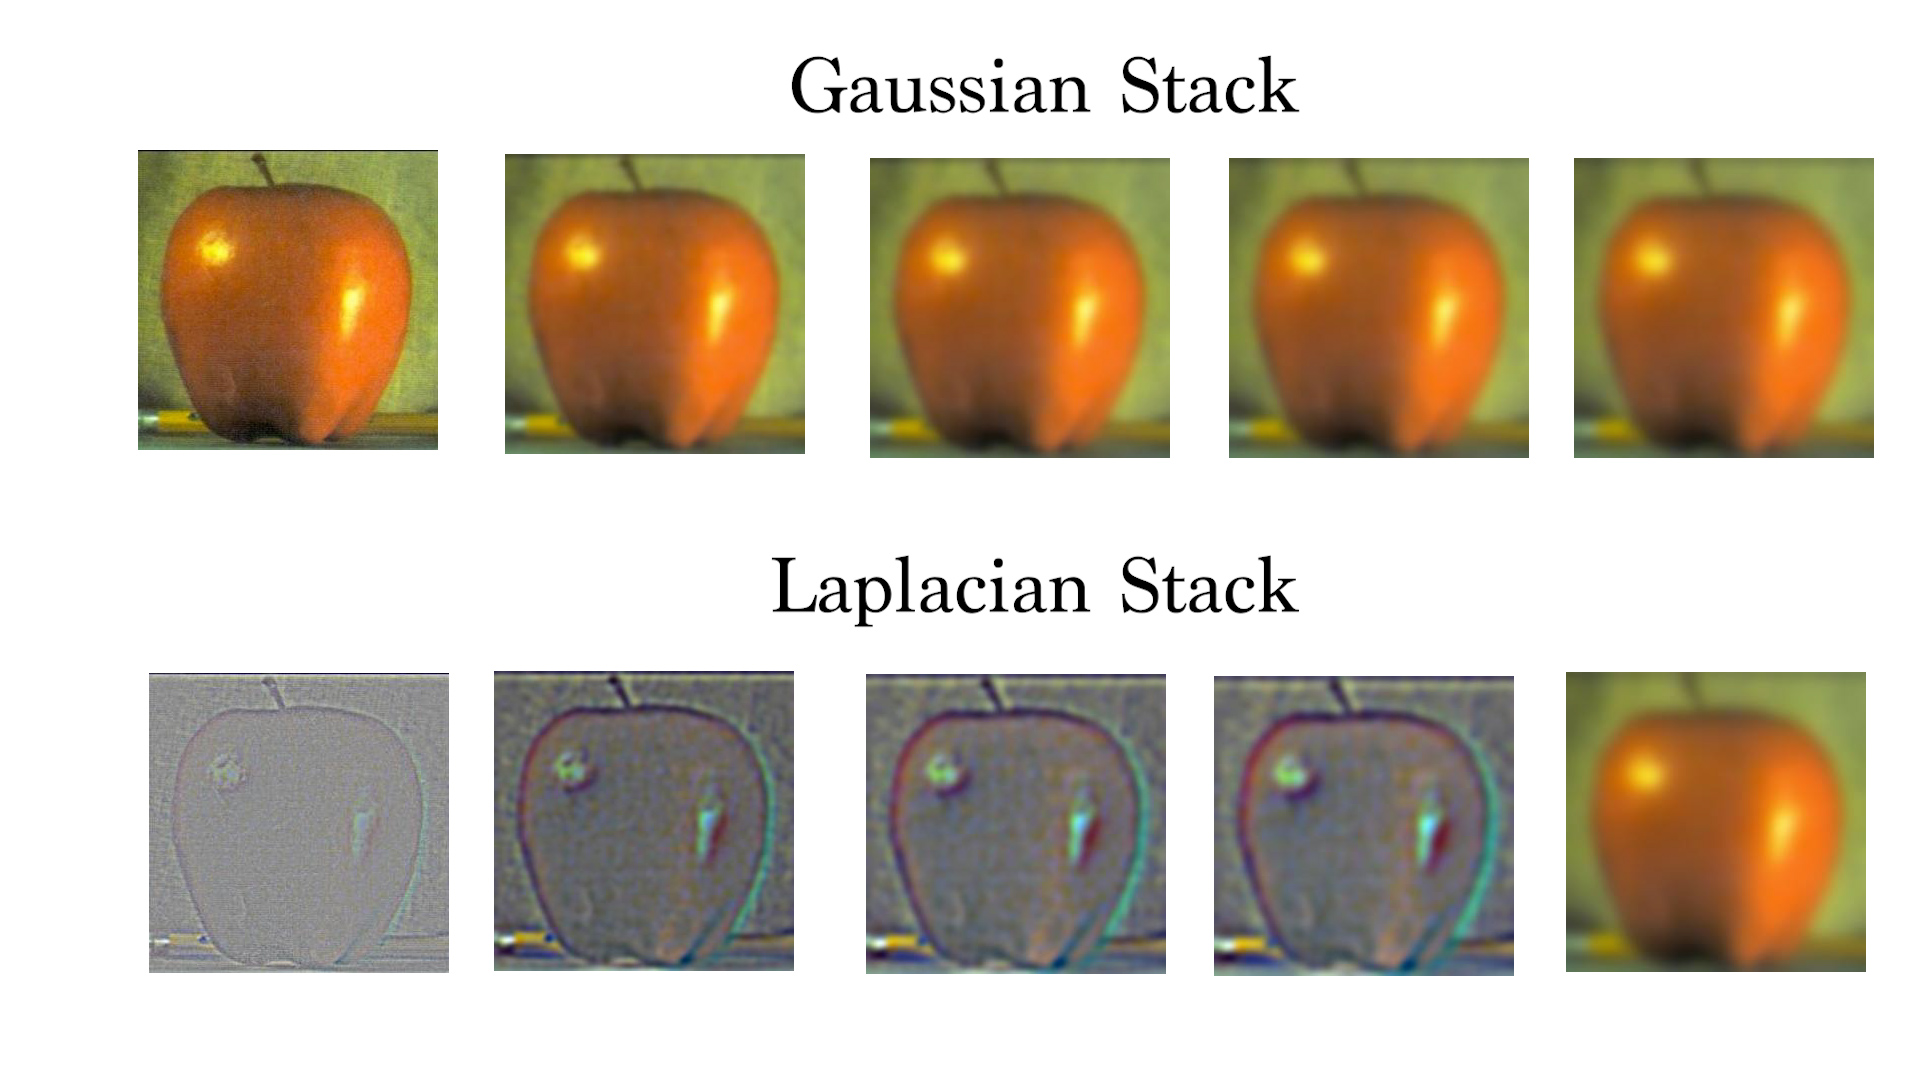
2.3: Gaussian and Laplacian Stacks
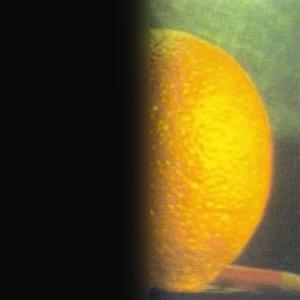
We can create decompositions of the frequencies of an image by successively passing in an image through a low pass filter (gaussian blur) repeatedly which can generate a gaussian stack. By subtracting each layer with its previous entry, we can extract the layer of frequencies that didn’t get through the following low pass filter. These images construct the laplacian stack, which consists of the composition of the layers of frequencies of an image, starting with the highest and down to the lowest.
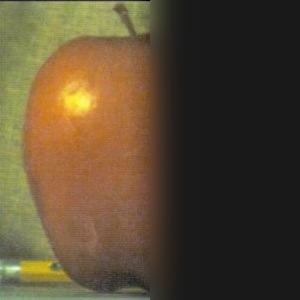
In this example, I have created a gaussian and laplacian stack for the given apple image.
I have also recreated a Figure from Burt and Adelson’s A Multiresolution Spline With Application to Image Mosaics 1983 paper showing the laplacian stack to generate an “orapple” (combination of an apple and orange). I created a laplacian stack of 5 levels of the apple and orange with the mask applied.
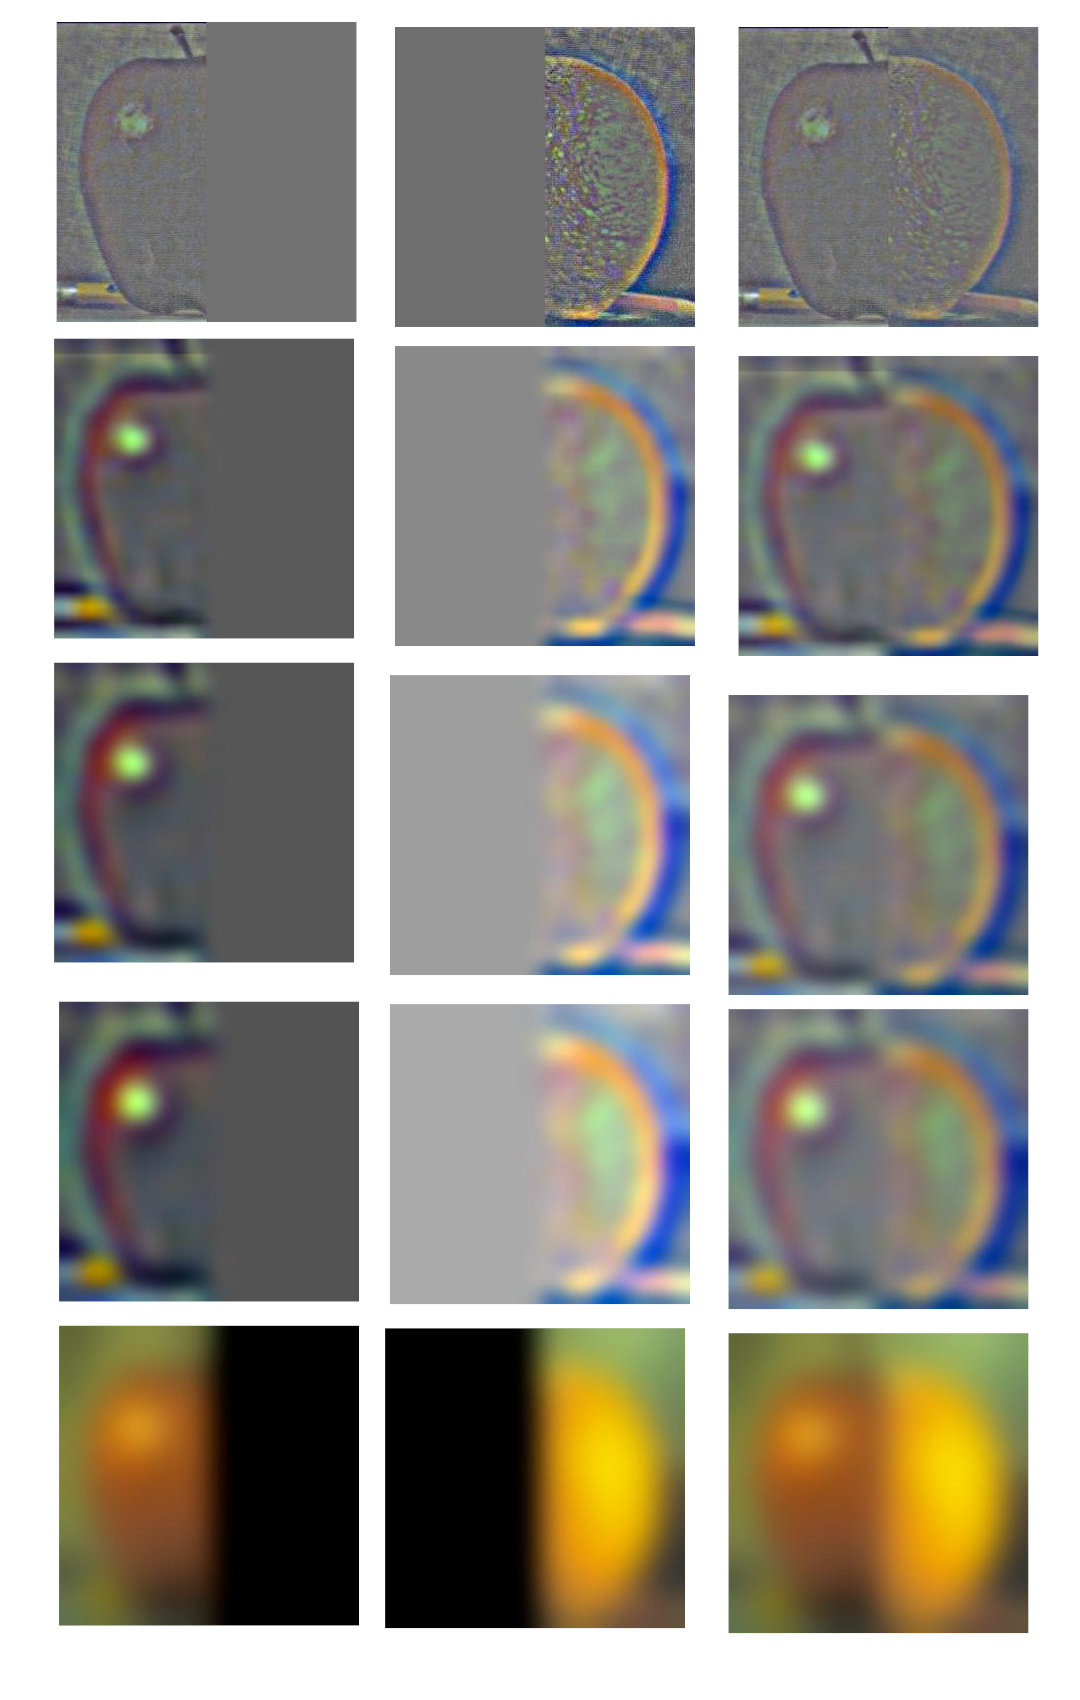
We can sum the images in a laplacian stack along with the lowest layer of the gaussian stack to reconstruct the original image.
| Apple | Orange | Orapple |
|---|---|---|
 |
 |
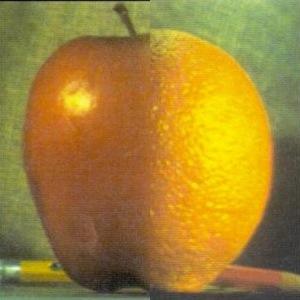 |
2.4: Multiresolution Blending (a.k.a. the oraple!)
With laplacian and gaussian stacks, we can implement an image blending operation as described in A Multiresolution Spline With Application to Image Mosaics. We can input two images and a mask (to indicate what we want blended) to generate a mostly seamless blend across two images by taking into account the high frequencies when blending. This is achieved by creating laplacian stacks of our two input images (in this case the orange and apple) and a gaussian stack of the mask. Next, at each level of the stack, we multiply the laplacian image with the region of the mask corresponding to the image. Finally we collapse the stack by summing the levels to achieve the final blend.
Here is an example of the orapple based on the previous figures:

Custom images
For my examples, I first put the two input images and the mask which blends the context of the second image into the first.
An example I created was creating a de-aged Indiana Jones, given an image of current and younger Indy. I created an irregular mask over the face and blended his younger face over his current head, creating a mostly seamless blend.
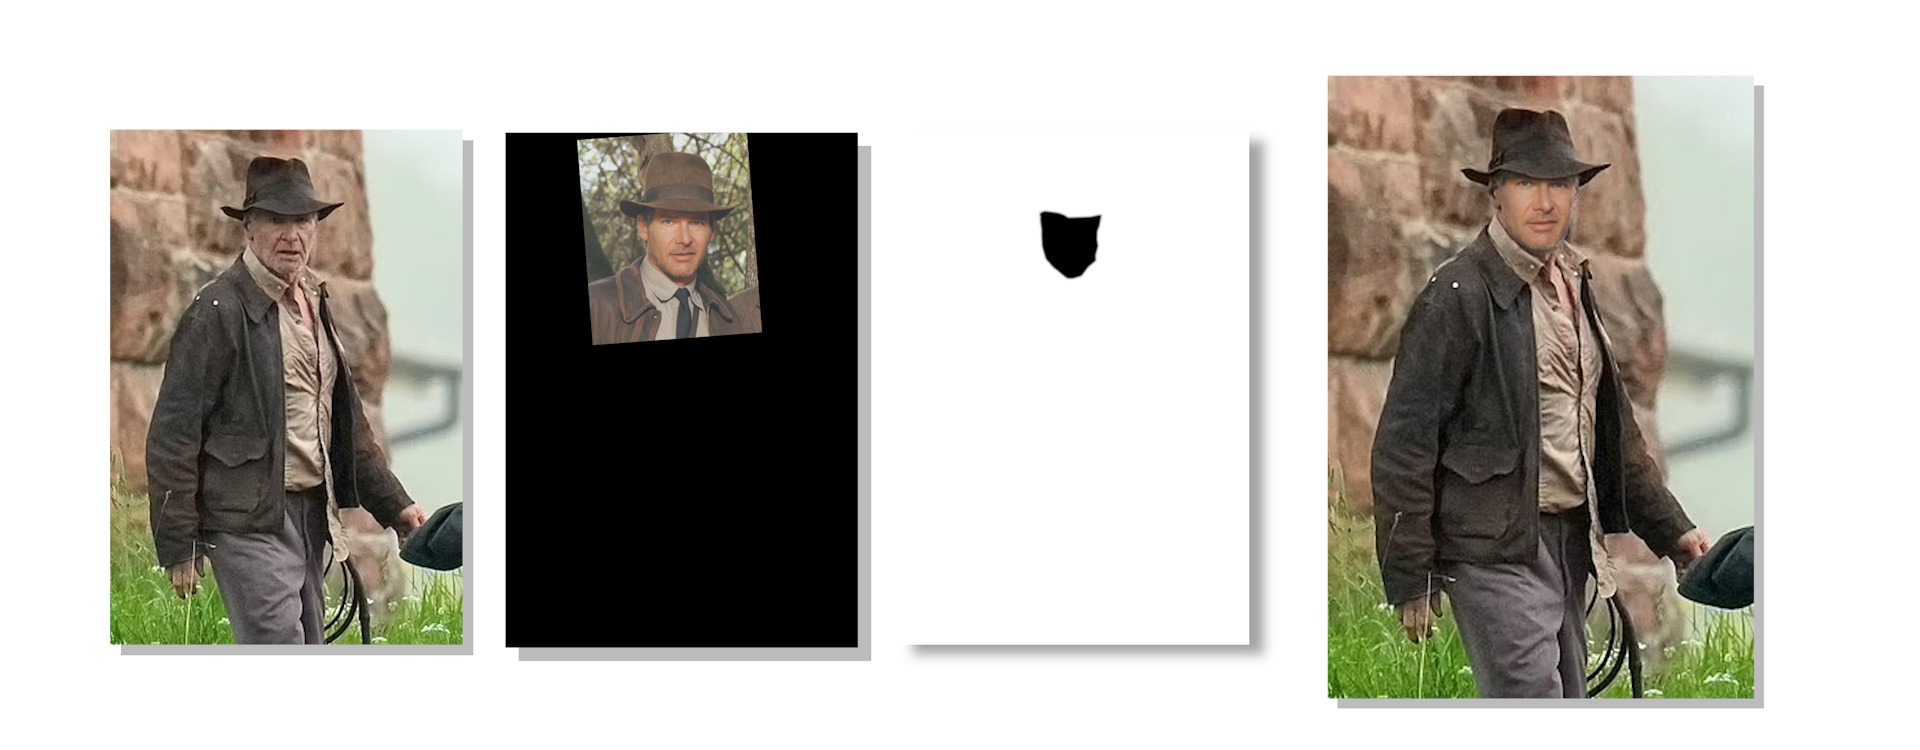
Here is a decomposition of the blending showing the intermediate operations with the laplacian stacks of the input images and mask. The sum of the lowest row gives us the final blend

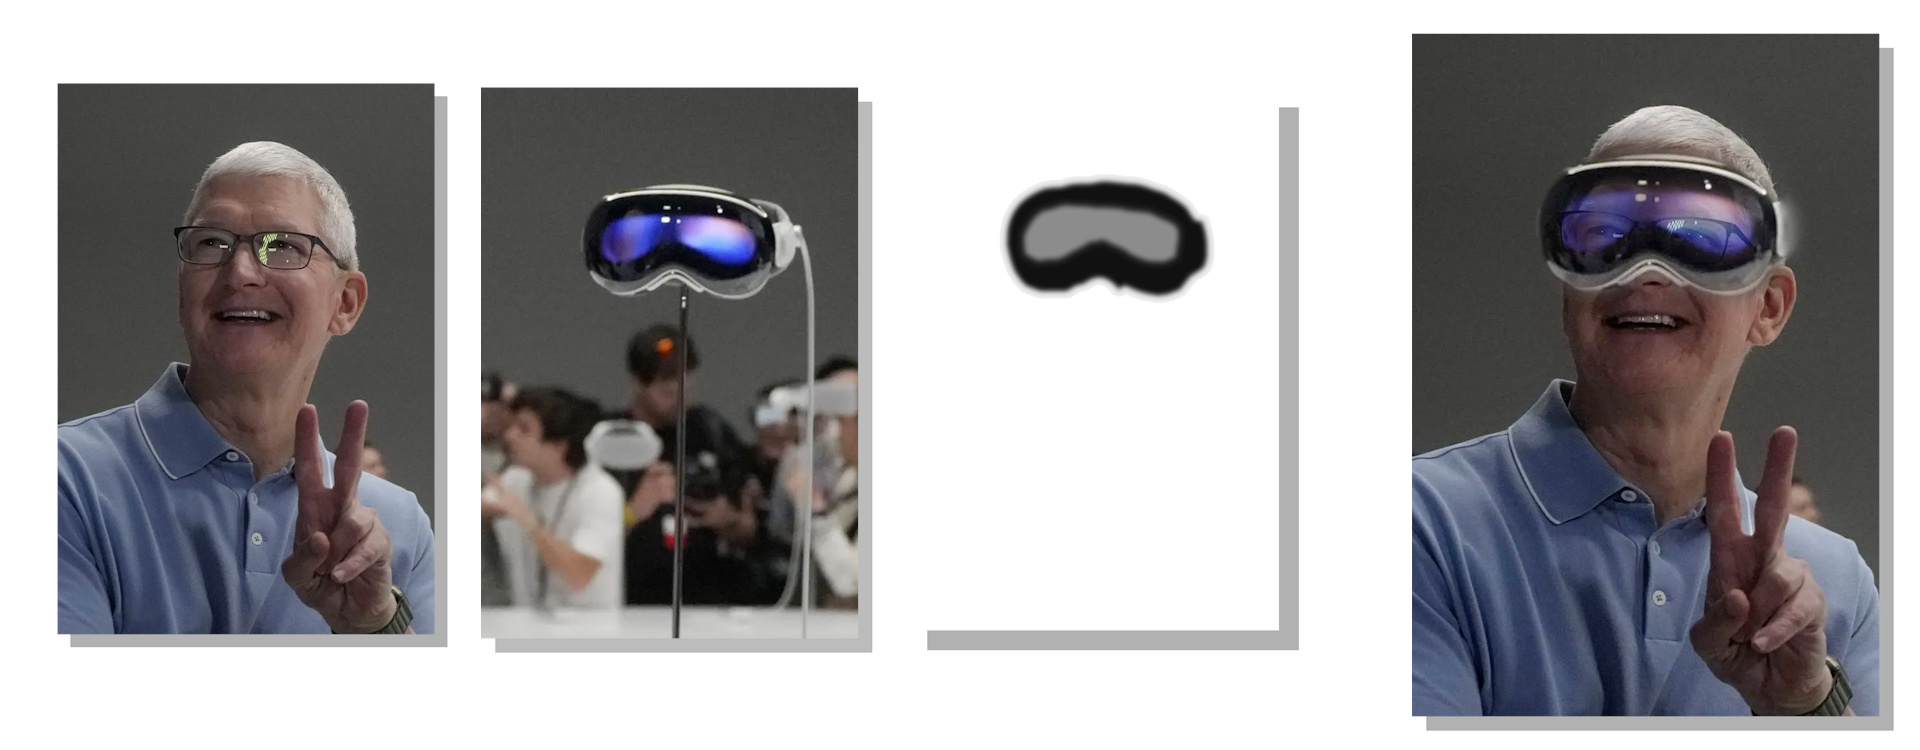
I also created another blend of Tim Cook wearing the Apple Vision Pro. I created the mask to be of the VR headset and aligned both images to layered the headset over his face (however the rotation of the headset in the image is not perfectly aligned with his face, but the effect is still visible). Since the Apple Vision Pro has a front facing 3D display to give the effect of seeing the person’s eyes through the headset, I wanted to simulate/experiment with this effect by not binarizing the mask and making it less dark on the eye part of the headset. This way, the frame of the headset would be opaque while the front eye display will be transparent. Therefore both images will be composited and blended in the center part of the headset to give the effect of seeing his face through the headset.
I also created a blend of Paul Debevec’s miniature Campanile from his short film with the real-life Campanile. This example uses a vertical seam to blend the aligned images together.

Bells and Whistles
I implemented image blending in color by performing the operation in the R,G,B color channels. Having the images in color adds to the realism and makes the images more complete.
Reflection
I enjoyed this assignment by implementing features I have been aware of in image processing software and being able to create some cool hybrid and blend images of my own. I found it interesting that it is possible to extract detail of images at different levels and use those to manipulate other images as seen in the hybrid and blend operations. I believe the most important concept I learned was the importance of image frequencies in image processing and additional details on frequency filters, since I use them in Photoshop, but didn’t know how they were implemented.
Bells and Whistles
I have implemented color for the hybrid and blending operations.