CS280A Project 3
Face Morphing
Name: Cyrus Vachha (cvachha@berkeley.edu)
Introduction
This project explores methods for face morphing and blending effects through affine transformations. In this project we create renders of face morphing by finding corresponding points, triangulating the face into corresponding triangles across two faces, and then warping the triangles into each other with blending the pixel colors. We also perform analysis on a given dataset of annotated human faces by finding the average faces of sub-populations. We also experiment with warping the face geometry to create caricatures and other effects by finding the dimensionality of the faces and extrapolating them.
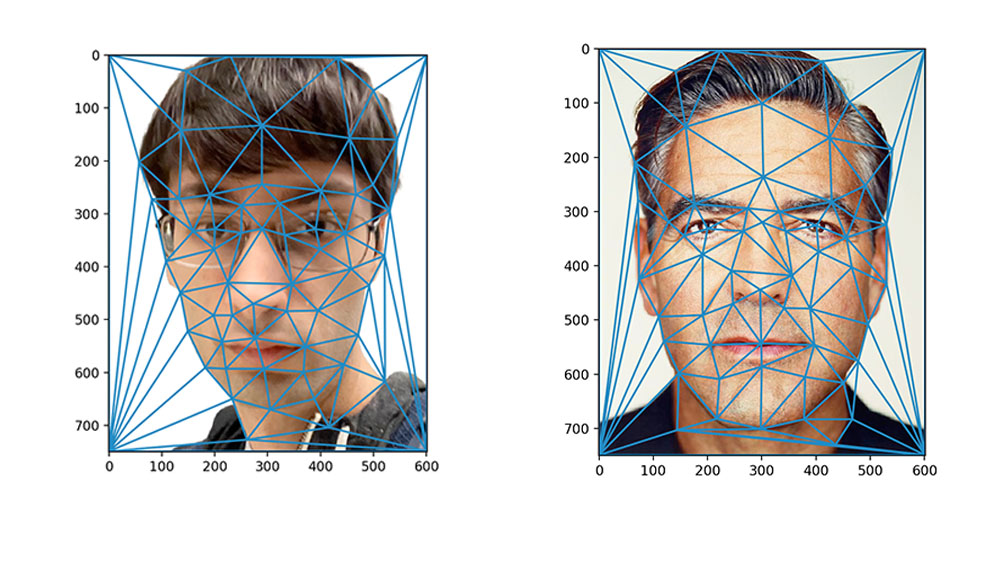
Part 1: Defining Correspondences
I first used the given webpage tool to select corresponding points for two faces, one of myself and the other of the sample george_small.jpg image. I then exported the points as a json file and was able to view the points on the image in python. I also had to add corner points of the image added since I needed the background and other parts of the images to blend.
I then found the averages of the facial corresponding points for both faces to create a shared triangulation points for the two faces. I used the scipy.delaunay function to generate and plot the triangulation.
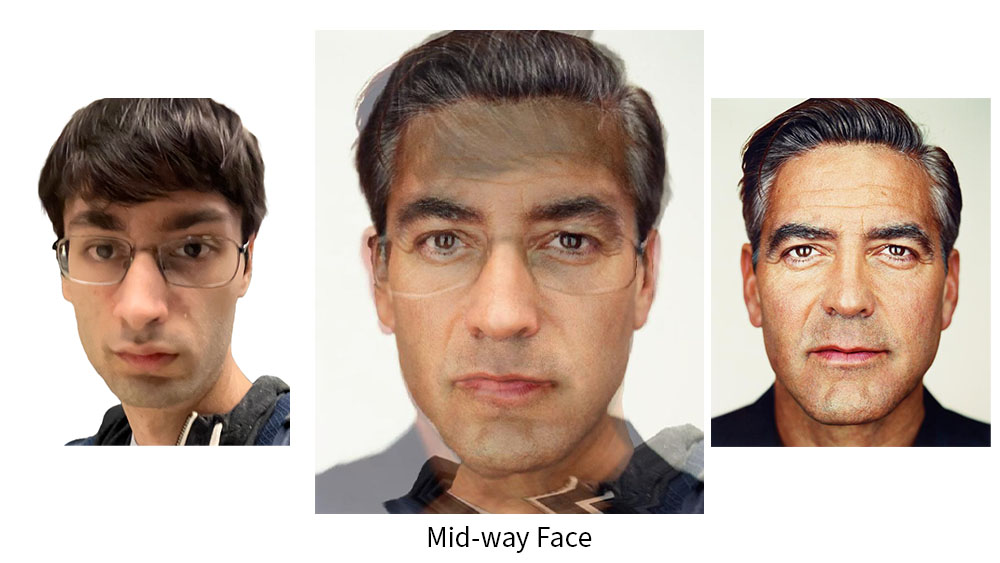
Part 2: Computing the “Mid-way Face”
I created a mid-way face blend where I render an image that blends both faces and 50% of the morph. I used the triangulation in the previous part to warp the individual triangles from each face image into the mid way morph. I did this by calculating the affine transformation for each triangle to perform inverse warping into the corresponding mid face triangle.
To improve the warped pixel colors, I applied the correct pixel color by averaging the pixel colors for the warped triangle from both images and interpolating the pixel colors from the original face images through inverse warping. In this process I iterated over every triangle in the mid-face triangle and sampled from the pixels in the original face images using scipy.interpolate.griddata to apply the final interpolated color. I initially used the bilinear sampling method, however it was extremely slow so I switched to nearest.
Part 2: The Morph Sequence
I modified my function to run with a given timestep for warping which allows me to specify the timestep for performing the affine warp and color blend. With this, I was able to create a final blend.
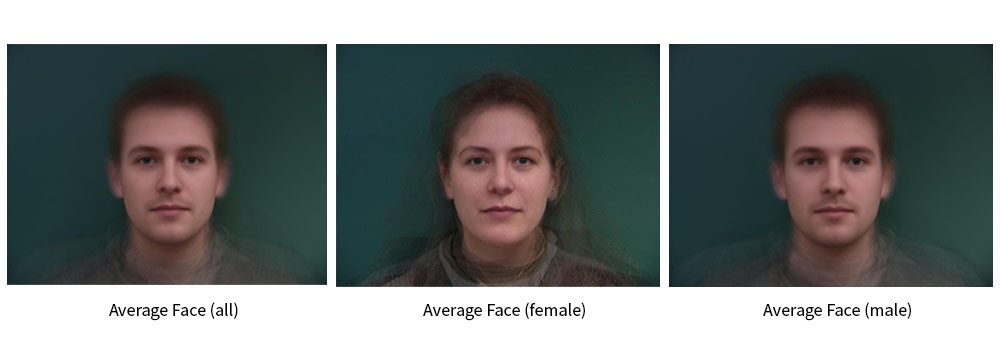
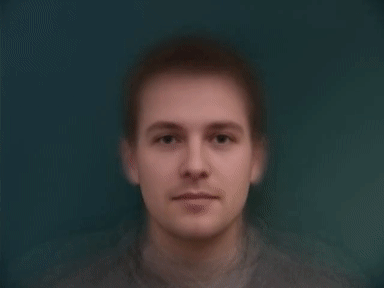
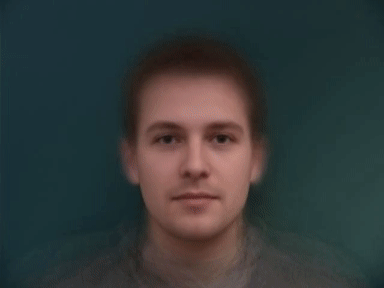
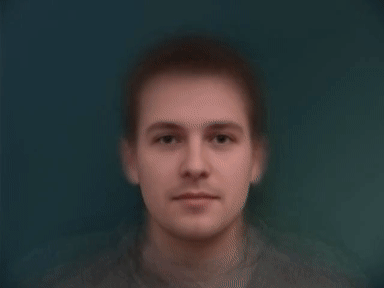
Part 4: The “Mean face” of a population
Using the Danes dataset, I found a way to extract the annotations from their given dataset of faces. I used the 48 faces and computed the averages of the 58 facial corresponding points to create the points and triangulation of the average face. I then warped every face in the dataset to fit the geometry of the “mean” face. Finally, I found the average pixel color for each pixel in the images to generate the final “mean face” of the population. We can see that it has smoothened out any abnormalities or details in the given faces, as well as resulted in a neutral expression.
I also performed this on the subsets of the images to generate the “mean face” for male and female participants.
Here are morphing animations of some of the faces from the dataset as well as faces warped to fit the average face.

I then warped my face to the “mean face” geometry and also warped the “mean face” to my face geometry. To keep consistent corresponding points with my face and the mean face, I had to re-apply the corresponding points to my face in the web tool in the exact order that they were applied in the mean face dataset. I achieved this by iteratively highlighting each annotation point and individually applying that corresponding point on my face. One observation I noticed was that the alignment corresponding points on my face were slightly different since my face was at a slight angle, so my face appears more distorted than normal. I also resized my face image to fit the same dimensions and applied a similar color background.
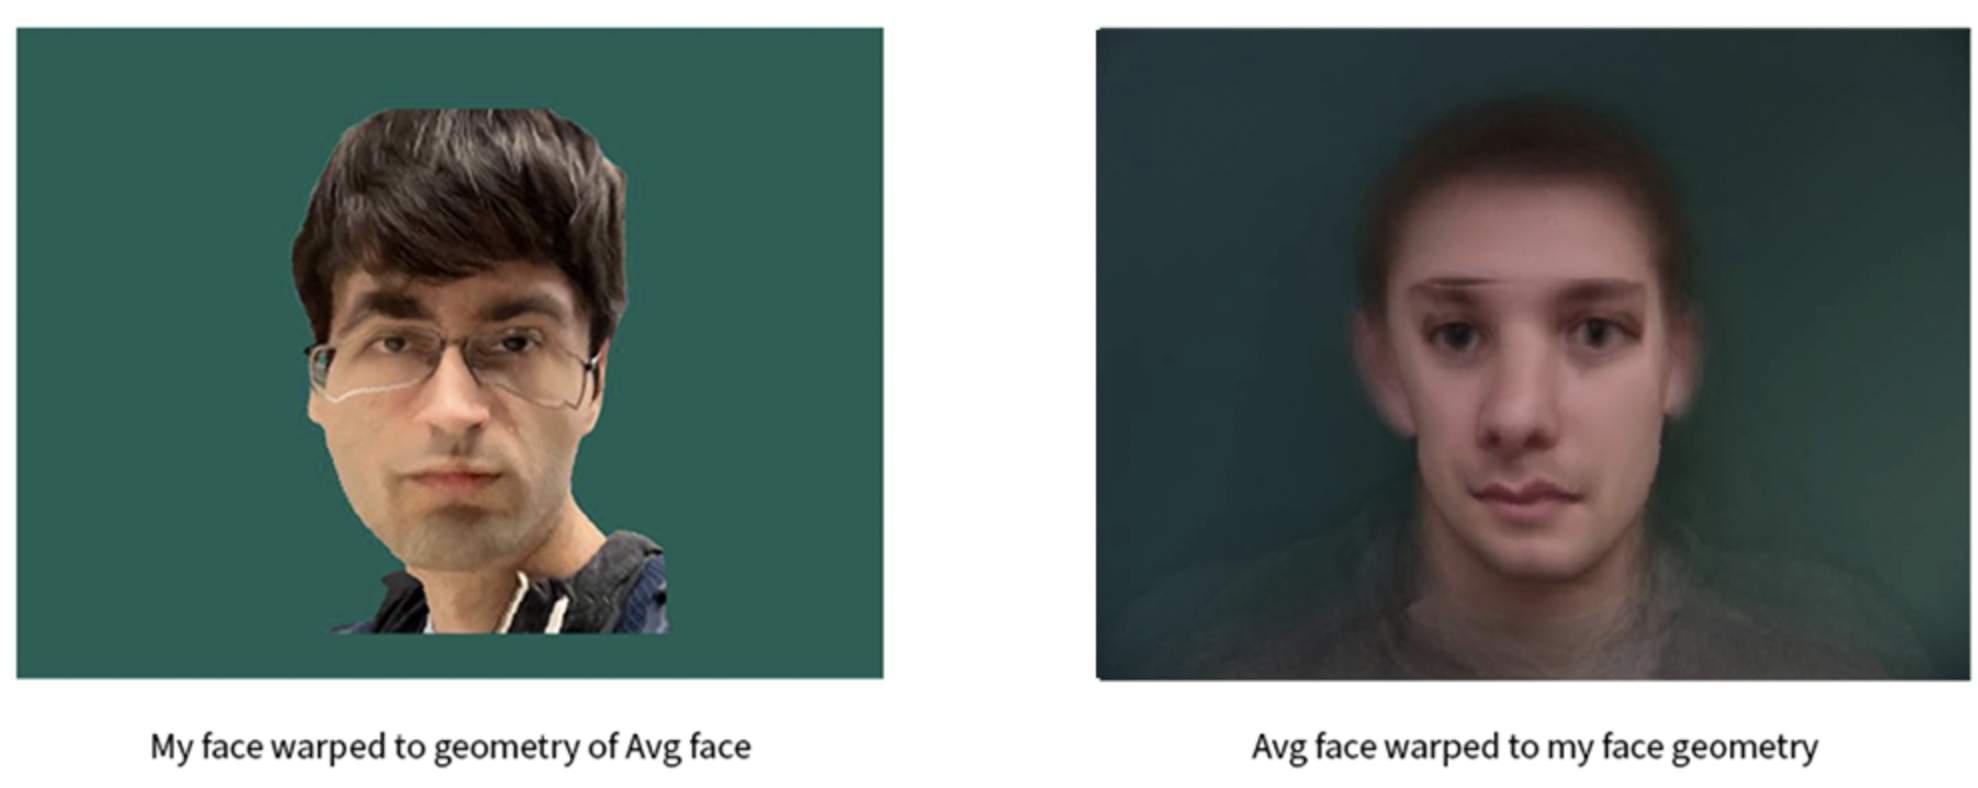
We can see that my face warped to the average face distorts the left side of the face image since I was rotated to the left. The average face warped to my geometry also shows the face slightly rotated in a similar way.
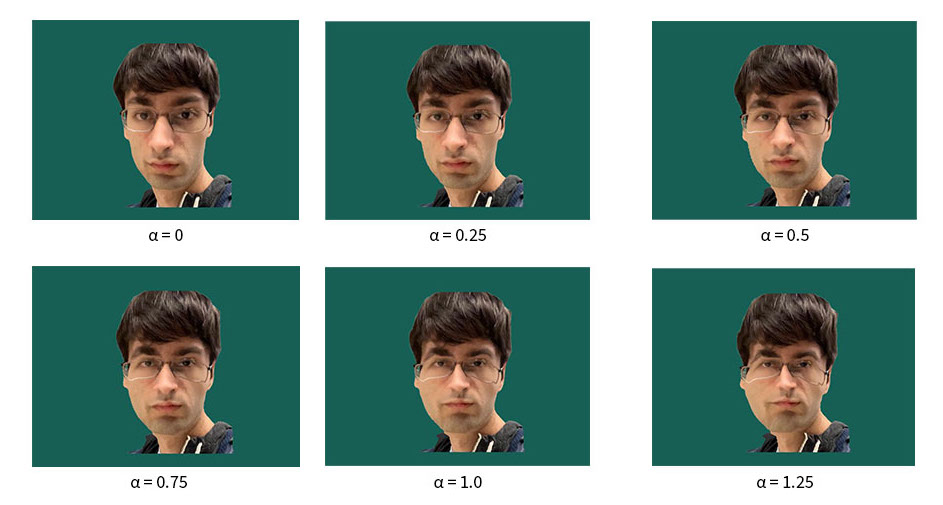
Part 5: Caricatures: Extrapolating from the mean
To create a caricature of my face, I need to find the components of my face that deviate from the mean. I subtracted the points from my face geometry from the points of the mean face computed in Part 4. Then, I added that difference to my face at different factors to observe the exaggerated effects, including the side face distortion.
Bells and Whistles
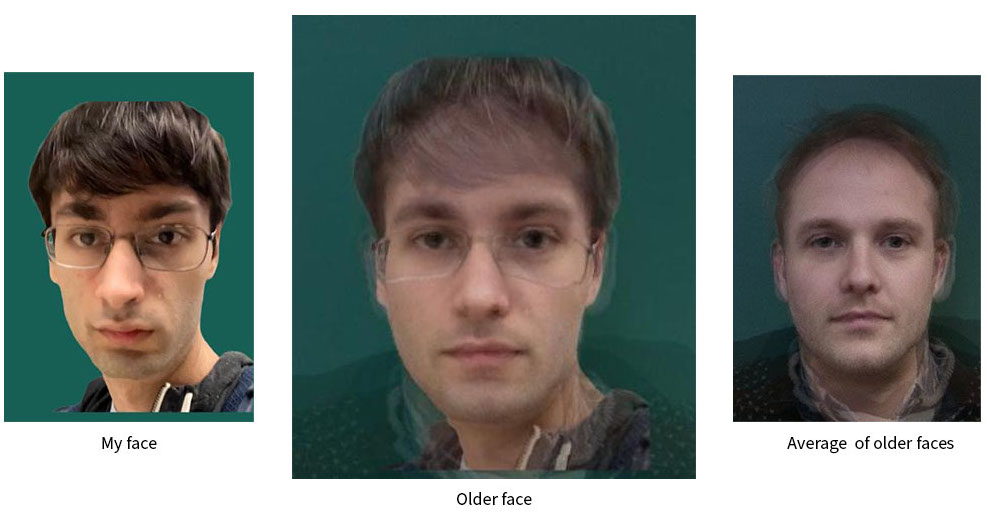
Aging face effect
I attempted to simulate a render of an older version of my face by blending it with an approximate average face of older people to change the age of my face. I created this average face by finding the older looking participants (four images) in the Danes dataset and computing the average of those faces warped to the average face. I kept a consistent background and was able to simulate that here along with a morph.
Music video morph
I also created a “music video” of morphs of my face wearing a few different VR/AR headsets depicting the Reality Virtuality continuum (Reality -> Augmented Reality -> Mixed Reality -> Virtual Reality). The background music was created with Stability AI Audio generation. Link to video on Google Drive
Additional Morph
I also created a morph of my face wearing Google Glass in 2013 and 2023.

Reflection
In this project, I learned more about coordinate transformations and how they can be applied to create morphing effects. I found it challenging but interesting to create the morphing system as well as performing analysis on the face dataset. I was familiar with the morphing effect, but I am glad that now I know how it works and can implement it.